In this guide
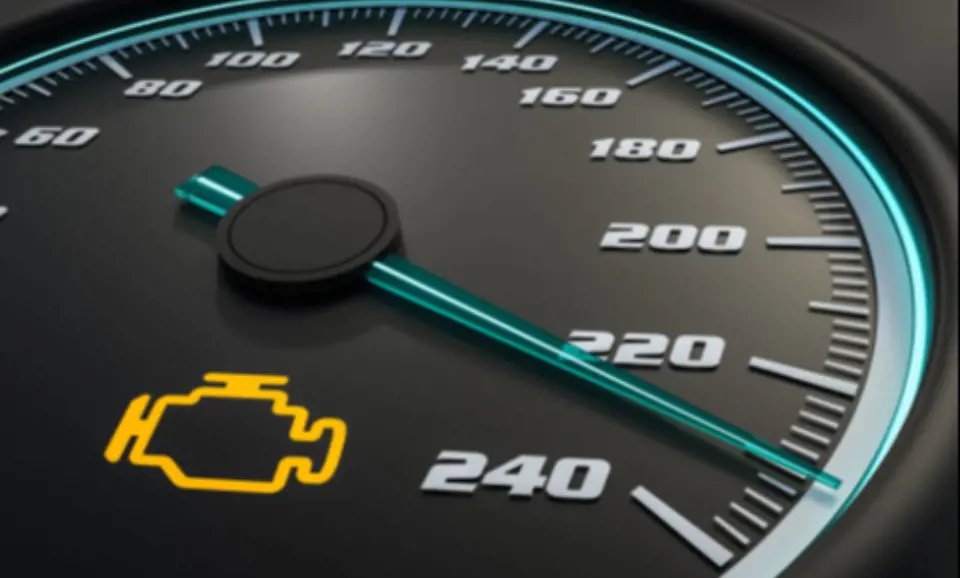
When you see your blinking check engine light suddenly illuminating on your dashboard while cruising down the highway, your heart might skip a beat. This flashing warning signal represents one of the most critical alerts your vehicle can send, demanding your immediate attention unlike any other dashboard indicator. While a steady check engine light suggests a problem that needs addressing soon, a rapidly flashing or blinking check engine light screams emergency and requires you to take action within seconds, not minutes or hours. This ultimate guide provides everything you need to know about this urgent automotive warning, from understanding the science behind why it blinks to knowing exactly how to respond, diagnose, repair, and prevent future occurrences.
Why Your Check Engine Light Blinks: The Science Behind the Warning
A blinking or flashing check engine light often indicates a more serious problem that requires immediate attention, specifically signaling that your engine’s onboard diagnostic system has detected active misfiring conditions occurring right now as you drive. Understanding what happens during an engine misfire helps explain why this warning demands such urgent response compared to other automotive alerts.
Your vehicle’s engine operates through precise combustion cycles where fuel and air mix in exact proportions, get compressed, then ignite at precisely the right moment to create controlled explosions that power your vehicle forward. Each cylinder must fire in perfect sequence, creating smooth, consistent power delivery. When one or more cylinders fail to fire correctly during this process, unburned fuel gets expelled directly into your exhaust system instead of generating power. This unburned fuel creates multiple cascading problems that worsen with every passing second you continue driving.
A misfire means one or more of your engine’s cylinders aren’t firing properly, which can cause raw fuel to be dumped into the exhaust system, potentially damaging your catalytic converter. The raw fuel entering your exhaust system doesn’t just pass through harmlessly. Inside your catalytic converter, temperatures already run extremely hot during normal operation, often exceeding 800 degrees Fahrenheit. When unburned fuel enters this superheated environment, it ignites, causing temperatures to skyrocket beyond 1,200 degrees Fahrenheit or higher. These extreme temperatures literally melt the internal honeycomb structure of your catalytic converter, transforming it from an emissions-controlling component into an expensive paperweight.
Modern vehicles monitor hundreds of sensors throughout their systems, from oxygen sensors in the exhaust to crankshaft position sensors in the engine block. When the engine control module detects misfires occurring, it immediately calculates whether the situation threatens immediate component damage. If the misfire rate exceeds safe thresholds, the module commands your check engine light to flash rather than simply illuminate steadily, creating an unmistakable visual alarm that something seriously wrong requires your immediate response.
Immediate Action Plan When You See a Flashing Check Engine Light
If the light comes on while you are driving, it is important to pull over to a safe location as soon as possible to help prevent any further damage to your vehicle’s engine. The moments immediately following when you first notice your check engine light flashing determine whether you face a manageable repair bill or catastrophic engine damage. Following the correct sequence of steps protects both your vehicle and your safety.
Step 1: Safely Pull Over Immediately
The instant you notice your check engine light blinking, begin looking for the nearest safe location to stop your vehicle. This might be a parking lot, wide highway shoulder, gas station, or residential side street. Activate your hazard lights immediately to alert other drivers that you’re experiencing an emergency. Do not attempt to reach your destination, drive to the nearest repair shop, or even continue to the next exit unless absolutely necessary for safety reasons. Every additional mile you drive with active misfires exponentially increases the damage to your catalytic converter and potentially other engine components.
Step 2: Turn Off Your Engine Completely
Once you’ve stopped safely, turn off your engine immediately. Even idling with active misfires continues damaging your catalytic converter. A blinking check engine light means your vehicle is not operating properly and could suffer more severe damage if driven in this condition. The few minutes you save by keeping the engine running while deciding what to do next could cost you hundreds or thousands of dollars in additional repair expenses.
Step 3: Perform Basic Checks
While you wait for assistance, perform these simple diagnostic checks that sometimes identify obvious problems. Check the gas cap and make sure it is tightened securely. While a loose gas cap more commonly triggers a steady check engine light rather than a flashing one, securing it properly takes only seconds and occasionally resolves the issue. Listen for unusual sounds like hissing, knocking, or ticking. Smell for burning odors, coolant leaks, or fuel vapors. Check your temperature gauge to ensure the engine isn’t overheating. Note any unusual symptoms your vehicle displayed before the light started flashing, such as hesitation, power loss, or strange noises.
Step 4: Contact Roadside Assistance or Towing Services
Call your roadside assistance provider, insurance company’s emergency service, or a local towing company. Yes, towing costs money, typically $75 to $150 for local tows. However, this expense pales in comparison to the $1,000 to $3,000 catalytic converter replacement you’ll face if you attempt to drive with active misfires. Addressing the issue promptly can prevent further damage and potentially save you money in the long run. Have your vehicle towed directly to a qualified repair facility rather than attempting to diagnose or fix the problem yourself at the roadside.
Step 5: Never Ignore a Flashing Light, Even If It Stops
It’s important not to ignore a flashing check engine light, as it indicates that there may be serious problems. Continuing to drive the vehicle while the engine light is flashing can lead to further damage or even breakdown. If your blinking check engine light stops flashing and either remains steady or goes out completely, this doesn’t mean the problem magically fixed itself. The diagnostic trouble codes remain stored in your vehicle’s computer memory, and the underlying mechanical issue still exists. The misfires might have temporarily stopped due to changing conditions like engine temperature or load, but they will return and likely worsen over time.
Understanding Check Engine Light Patterns: What Different Behaviors Mean
Your check engine light communicates different levels of urgency through its behavior patterns. Learning to recognize these patterns helps you assess situations accurately and respond appropriately to protect your vehicle and wallet.
Steady Illumination: Non-Urgent But Important
When your check engine light comes on and remains steadily lit without flashing, this typically signals a problem that needs attention within days or weeks but doesn’t require pulling over immediately. Common causes include faulty oxygen sensors, evaporative emission system leaks, minor sensor malfunctions, or aging components beginning to fail. You can generally continue driving to your destination, then schedule a diagnostic appointment soon. However, don’t ignore a steady check engine light indefinitely, as many minor problems evolve into major failures when neglected.
Intermittent Flashing: Soft Failures Under Specific Conditions
A flashing Check Engine Light at high speeds usually indicates engine misfire. Sometimes your check engine light blinks only under certain driving conditions like acceleration, highway speeds, or cold starts, then stops flashing and may even turn off completely once conditions change. This intermittent behavior suggests problems that occur only when the engine operates under specific loads, temperatures, or speeds. Common causes include borderline-failing ignition components, fuel delivery issues that manifest under heavy load, or sensor problems that occur only at certain operating temperatures. While this seems less serious because the light goes away, the intermittent nature actually makes diagnosis more challenging and indicates components operating on the edge of failure that will soon fail completely.
Continuous Rapid Flashing: Maximum Emergency Alert
If your check engine light blinks continuously and rapidly without stopping, this represents the highest level of automotive emergency short of visible smoke or flames. This pattern indicates severe, ongoing misfires occurring across multiple cylinders simultaneously or catastrophic sensor failures affecting critical engine functions. A flashing check engine light indicates a serious issue, such as an engine misfire or fuel system problem. Pull over and stop driving immediately to avoid further damage to the engine. Stop driving immediately regardless of where you are, as continuing to operate your engine in this state risks complete engine failure within minutes.
The Most Common Causes of a Blinking Check Engine Light
Understanding what triggers your flashing check engine light helps you prevent these emergencies through proper maintenance and early intervention when warning signs appear. Based on diagnostic data analyzing millions of vehicles, these represent the primary causes mechanics encounter.
Engine Misfires: The Number One Culprit
Engine misfire occurs when the fuel-air mixture in one or more cylinders fails to ignite properly. This misfire can be caused by various factors, such as ignition coil failure, spark plug issues, injector problems, or oxygen sensor malfunctions. Engine misfires account for the vast majority of blinking check engine light situations, occurring when combustion fails to happen correctly in one or more cylinders. The misfire itself doesn’t directly damage your engine in the immediate term, but the cascading effects quickly cause expensive failures throughout your exhaust and emissions systems.
When cylinders misfire, they create rough engine operation, vibrations you can feel through the steering wheel and floorboard, noticeable power loss during acceleration, and dramatically reduced fuel economy as your engine computer tries compensating by adjusting fuel delivery to other cylinders. More critically, each misfiring event dumps raw, unburned fuel directly into your exhaust system. This fuel travels through your exhaust manifold, past your oxygen sensors, and into your catalytic converter where it ignites due to the extreme heat, progressively destroying this expensive emission control device.
Multiple factors cause misfires, making proper diagnosis essential. Worn or fouled spark plugs represent the most common cause, particularly in vehicles that have exceeded their recommended spark plug replacement intervals. Failed ignition coils prevent proper spark delivery to specific cylinders. Clogged or malfunctioning fuel injectors disrupt proper fuel delivery. Low compression from worn piston rings, damaged valves, or head gasket failures prevents adequate cylinder pressure for combustion. Vacuum leaks introduce unmetered air that disrupts proper air-fuel ratios. Each of these root causes requires different diagnostic approaches and repair solutions.
Ignition System Failures: When Sparks Don’t Fly
Faulty spark plugs, ignition coils, or wiring can trigger misfires and cause the light to blink. Your vehicle’s ignition system must generate powerful electrical sparks at precisely the right moments to ignite compressed fuel-air mixtures in each cylinder. This system consists of multiple interconnected components, and failure of any single element disrupts the entire ignition process for one or more cylinders.
Spark plugs gradually wear down over tens of thousands of miles through normal operation. The center electrode erodes, the gap widens beyond specifications, carbon deposits accumulate on the insulator tip, and the spark becomes weaker and less consistent. Most manufacturers specify spark plug replacement intervals between 30,000 miles for conventional copper plugs and 100,000 miles for premium iridium or platinum plugs. Exceeding these intervals invites misfire problems that trigger your blinking check engine light.
Ignition coils transform your battery’s 12 volts into the 15,000 to 40,000 volts needed to create sparks across spark plug gaps. Modern vehicles typically use individual coil packs mounted directly on each spark plug, eliminating spark plug wires. These coils eventually fail due to heat stress, vibration, and the enormous electrical loads they handle. When a coil fails, its corresponding cylinder stops firing completely, creating the exact misfire condition that causes your check engine light to flash.
In older vehicles using traditional distributors and spark plug wires, these wires can crack, develop electrical leaks, or break internally. The high-voltage electricity intended for spark plugs then escapes to ground through damaged wire insulation rather than creating sparks in cylinders. Visual inspection often reveals cracked or damaged spark plug wires, making them relatively easy to diagnose and inexpensive to replace compared to other ignition system components.
Fuel System Problems: When Your Engine Starves
Issues with the fuel injectors or fuel pump can affect engine performance and cause warning lights to flash. Your engine requires precise fuel delivery at exact pressures and timing to maintain proper combustion in all cylinders. The fuel system encompasses several components, each critical to maintaining the correct air-fuel mixture ratios needed for efficient combustion.
Fuel injectors spray atomized fuel directly into each cylinder’s intake port or combustion chamber depending on your engine design. Over time, these precision components accumulate varnish deposits from fuel additives, carbon buildup from combustion byproducts, and microscopic particles that pass through fuel filters. Partially clogged injectors spray irregular patterns, deliver insufficient fuel, or fail to open and close at correct intervals. These problems create lean conditions where cylinders receive too much air relative to fuel, causing misfires that trigger your flashing check engine light.
Your fuel pump must maintain consistent pressure throughout your fuel system, typically between 30 and 80 PSI depending on vehicle design. Pumps gradually weaken over time, particularly in vehicles with high mileage. A failing pump might maintain adequate pressure during gentle driving but struggle under heavy acceleration or sustained high-speed operation when fuel demands increase dramatically. This creates intermittent misfires that occur only under load, making diagnosis more challenging since the problems don’t manifest during casual driving or basic diagnostic testing.
Fuel filters trap microscopic contamination particles from fuel tanks and fuel systems, preventing these particles from reaching injectors. Severely clogged filters restrict fuel flow, effectively starving your engine of the fuel it needs for proper combustion. Most manufacturers recommend replacing fuel filters every 30,000 to 60,000 miles, though this interval varies significantly between vehicles. Many modern vehicles incorporate fuel filters into their fuel pump assemblies inside fuel tanks, making routine replacement less common but sometimes necessitating complete fuel pump replacement when filters clog.
Catalytic Converter Damage: Effect Becomes Cause
Driving with a misfire can quickly damage your catalytic converter, leading to expensive repairs. While catalytic converter problems often result from other issues rather than being the primary cause, a severely damaged or completely failed catalytic converter can itself trigger misfires and cause your check engine light to flash. Understanding this relationship helps explain why addressing check engine lights promptly matters so much.
Catalytic converters contain precious metal catalysts arranged on ceramic honeycomb structures. These catalysts chemically convert harmful exhaust emissions into less toxic compounds through high-temperature reactions. When the honeycomb structure melts from excessive heat caused by misfires, or when catalyst materials degrade from age and contamination, exhaust flow becomes restricted. Severe restrictions create excessive backpressure that prevents cylinders from expelling exhaust gases properly. This trapped exhaust prevents fresh air-fuel charges from entering cylinders during intake strokes, causing misfires even when ignition and fuel systems function perfectly.
A failing catalytic converter exhibits multiple warning signs beyond the flashing check engine light. You might notice a sulfur or rotten egg smell from your exhaust as the converter fails to process sulfur compounds properly. Engine performance dramatically decreases, particularly during acceleration when exhaust flow increases. You might hear rattling sounds from underneath your vehicle as broken internal honeycomb pieces shift around inside the converter shell. Fuel economy plummets as your engine struggles against excessive exhaust backpressure. Addressing catalytic converter problems represents one of the most expensive check engine light repairs, with costs often ranging from $500 to $2,500 depending on your vehicle and converter location.
Sensor Malfunctions: When Your Engine’s Eyes and Ears Fail
Oxygen or mass airflow sensor malfunctions may cause engine irregularities that trigger the blinking light. Modern engines rely on numerous sensors providing continuous real-time data to your engine control module, allowing it to optimize fuel delivery, ignition timing, and emissions control. When critical sensors fail or provide incorrect data, your engine computer makes faulty decisions that can cause misfires triggering your blinking check engine light.
Oxygen sensors monitor oxygen levels in exhaust gases, measuring whether combustion is running rich (too much fuel) or lean (too little fuel) compared to ideal stoichiometric ratios. The oxygen sensor measures the level of oxygen in your vehicle’s exhaust. Most vehicles have multiple oxygen sensors positioned before and after the catalytic converter. When these sensors fail, they send incorrect feedback to your engine computer, causing it to adjust fuel delivery inappropriately. This creates excessively rich or lean conditions that cause misfires, rough running, and poor fuel economy.
Mass airflow sensors measure exactly how much air enters your engine, allowing the computer to calculate precise fuel injection quantities needed to maintain proper air-fuel ratios. When these sensors become contaminated with oil films, dust, or debris, they provide incorrect airflow readings. Your engine computer then delivers wrong fuel amounts based on this bad data, creating rich or lean conditions that cause misfires. An issue with the mass air flow sensor can lead to stalling and hesitation during acceleration, as well as up to a 25% drop in fuel economy.
Crankshaft and camshaft position sensors tell your engine computer precisely where pistons and valves are positioned at any given instant. This information allows perfectly timed fuel injection and ignition spark delivery. When these sensors fail or provide intermittent signals, your engine computer loses track of where pistons are in their cycles, causing mistimed ignition and fuel delivery that results in misfires severe enough to trigger your flashing check engine light.
Decoding Diagnostic Trouble Codes: What Your Car Is Saying
When your check engine light blinks, your vehicle’s computer simultaneously stores specific diagnostic trouble codes identifying which systems detected problems and under what conditions the faults occurred. Understanding common codes associated with flashing check engine lights helps you communicate more effectively with repair technicians and comprehend the severity and nature of problems affecting your vehicle.
P0300: Random or Multiple Cylinder Misfire
The P0300 diagnostic code indicates your engine computer has detected misfires occurring across multiple cylinders in random patterns rather than consistently affecting one specific cylinder. This code suggests problems affecting your entire engine rather than components serving individual cylinders. Common causes include bad fuel quality, low fuel pressure affecting all cylinders equally, widespread ignition timing errors, vacuum leaks introducing unmetered air throughout the intake system, or failing fuel pumps unable to maintain adequate pressure under load.
Random misfires prove particularly challenging to diagnose because they point toward systemic issues rather than failed individual components. Mechanics must perform comprehensive testing of fuel pressure, ignition timing, vacuum systems, and engine management computer operations rather than simply replacing cylinder-specific parts like spark plugs or ignition coils.
P0301 Through P0312: Cylinder-Specific Misfire Codes
These sequential codes identify which exact cylinder is experiencing misfires. P0301 indicates cylinder 1 misfiring, P0302 signals cylinder 2 misfires, and so on up to P0312 for twelve-cylinder engines. Cylinder-specific codes dramatically simplify diagnosis by focusing attention on components serving particular cylinders. Technicians can test that cylinder’s spark plug, ignition coil, fuel injector, compression, and valve operation to identify the specific failed component causing misfires.
When diagnostic scans reveal multiple cylinder-specific misfire codes simultaneously, this suggests either widespread component wear affecting several cylinders or systemic problems causing misfires across your engine. For example, seeing P0301, P0303, and P0305 together might indicate ignition coils beginning to fail en masse as they approach end of life, or it could signal fuel delivery problems affecting odd-numbered cylinders specifically.
P0171 and P0174: System Too Lean Conditions
These codes indicate your engine is running with excessive air and insufficient fuel in the mixture. Problems in the fuel system, such as fuel pump failure, injector malfunction, or a clogged fuel filter, can lead to an imbalance in the air-fuel mixture, which may cause the check engine light to flash. Lean conditions cause weak combustion or complete misfires because insufficient fuel exists to sustain flame propagation across the combustion chamber once spark ignition occurs.
Common causes include vacuum leaks allowing unmetered air to enter the intake system, failing fuel pumps unable to maintain adequate pressure, severely clogged fuel filters restricting flow, malfunctioning mass airflow sensors underreporting actual airflow quantities, or failing fuel pressure regulators unable to maintain correct system pressure. Diagnosing lean condition codes requires systematic testing of fuel pressure, vacuum system integrity, and sensor operation to identify the root cause.
P0420 and P0430: Catalyst System Efficiency Problems
These codes signal that your catalytic converter isn’t reducing emissions as effectively as federal standards require. While these codes don’t always immediately trigger flashing check engine lights by themselves, they frequently appear alongside misfire codes because unaddressed misfires rapidly damage catalytic converters. The P0420 code typically refers to Bank 1 (the side of the engine containing cylinder 1), while P0430 indicates Bank 2 on V-configuration engines.
When oxygen sensors before and after your catalytic converter report similar readings instead of showing dramatic differences in oxygen content, your engine computer concludes the converter isn’t functioning properly. This might indicate a damaged or contaminated catalyst, melted internal honeycomb structure from excessive heat, or simply an aging converter reaching end of life after 100,000+ miles of service.
How Professionals Retrieve and Interpret Codes
A professional will connect a diagnostic scan tool to read out the diagnostic trouble codes stored in the vehicle. Professional-grade OBD-II scanners connect to your vehicle’s diagnostic port, usually located under the dashboard near the steering column. These scanners retrieve all stored diagnostic codes, pending codes (problems detected but not yet severe enough to illuminate the check engine light), and freeze frame data capturing exact operating conditions when each code was set.
The computer can store additional data like when the code was set, how many times it was set, and the sensor reading at the time it was set. This historical information proves invaluable for diagnosing intermittent problems. For example, freeze frame data might reveal that misfires occur only when engine coolant temperature exceeds 195 degrees or only during heavy acceleration when manifold absolute pressure rises above certain thresholds. This contextual information guides technicians toward specific diagnostic paths rather than requiring comprehensive testing of every possible cause.
The True Costs of Driving with a Flashing Check Engine Light
The temptation to ignore your blinking check engine light and continue driving to your destination, work, or home can seem logical, especially if your vehicle appears to run reasonably well despite the warning. However, understanding the financial and safety risks of this decision should convince you that immediate action saves far more money than it costs.
The average repair cost for most check engine light-related breakdowns is about $3,285, though this figure encompasses all check engine light scenarios from minor to catastrophic. When specifically dealing with flashing lights indicating active misfires, continuing to drive transforms what might begin as a relatively inexpensive repair into a financial disaster. A $200 spark plug replacement that you could have addressed immediately by pulling over and calling for a tow instead evolves into a $1,500 catalytic converter replacement plus the original spark plug problem if you continue driving.
The physics of what happens inside your catalytic converter during active misfires explains this cost escalation. Your catalytic converter normally operates at temperatures around 800 to 1,000 degrees Fahrenheit during regular driving. When unburned fuel from misfiring cylinders enters the converter, it ignites inside the ceramic honeycomb structure, creating localized temperatures exceeding 1,600 degrees Fahrenheit. At these extreme temperatures, the ceramic substrate physically melts, the precious metal catalysts sinter together losing surface area and effectiveness, and the converter transforms from a functioning emissions control device into a restrictive, damaged component requiring complete replacement.
Beyond catalytic converter damage, ongoing misfires contaminate your engine oil with raw gasoline. This fuel dilution reduces oil’s lubricating properties, potentially causing bearing damage, increased cylinder wall wear, and accelerated aging of other internal engine components. The excessive heat generated by misfires can damage oxygen sensors positioned in the exhaust stream. Carbon deposits and partially burned fuel coat valves, pistons, and combustion chambers, creating conditions that promote additional problems even after you repair the original misfire causes.
Safety concerns compound financial risks. An engine misfire can impact your ability to accelerate, making you a potential hazard to other drivers. Vehicles experiencing severe misfires lose significant power, making highway merging, passing, and keeping pace with traffic flow difficult or impossible. Unpredictable power delivery creates dangerous situations where your vehicle might suddenly lose acceleration when you need it most. In worst-case scenarios, severe misfires can cause complete engine stalling, potentially leaving you stranded in traffic lanes, on railroad crossings, or other hazardous locations.
Professional Diagnosis: What Happens at the Repair Shop
When you have your vehicle towed to a qualified repair facility for your flashing check engine light, understanding the diagnostic process helps you make informed decisions and ensures you receive appropriate service for your specific problems. Professional diagnosis follows systematic procedures designed to accurately identify root causes rather than simply replacing parts until the light goes off.
Initial Code Retrieval and Analysis
The first step in addressing a check engine light is diagnosing the underlying issue. Technicians begin by connecting professional-grade OBD-II diagnostic scanners to your vehicle’s diagnostic port. The data comes directly from each vehicle’s OBD2 system, reported by millions of vehicle owners and the professionals who service them. These scanners retrieve all diagnostic trouble codes, both current and pending, along with freeze frame data showing exactly what your engine was doing when each code was set.
Professional mechanics will always check these before diving too deep into any issues that caused the light to come on. Experienced technicians immediately check manufacturer Technical Service Bulletins describing known problems affecting your specific vehicle make, model, and year. These bulletins often provide diagnostic shortcuts and recommended repair procedures for common issues, saving diagnostic time and preventing unnecessary part replacements.
After retrieving codes, technicians review freeze frame data to understand the context surrounding each fault. This data might reveal that misfires occur only at specific engine speeds, temperatures, or loads, providing crucial clues about which components to test. For example, misfires occurring only when the engine is cold suggest different problems than misfires appearing only during hard acceleration.
Comprehensive Physical Inspection
Following code analysis, technicians perform thorough visual inspections of your engine bay looking for obvious problems that codes alone might not fully explain. They inspect spark plugs and ignition coils for signs of oil fouling, carbon deposits, or physical damage. They examine vacuum hoses for cracks, loose connections, or deterioration. They look for oil leaks, coolant leaks, damaged wiring harnesses, or corroded electrical connections. This hands-on inspection often reveals problems that electronic diagnostics miss, such as vacuum leaks or damaged wiring that only fails intermittently.
Targeted Component Testing
Depending on why the code came on, mechanics will test out the sensors or other items like the injectors, fuel pump, spark plugs or just about any other part on the engine. Based on diagnostic codes and inspection findings, technicians perform focused testing of suspected components. This might include using multimeters to test ignition coil resistance values, performing fuel pressure tests to verify adequate delivery pressure throughout the RPM range, conducting cylinder compression tests to check engine mechanical condition, or using oscilloscopes to analyze ignition system waveforms.
This targeted testing approach prevents the common DIY mistake of replacing parts based solely on diagnostic codes without confirming they’ve actually failed. We recommend that you never replace a part based on only the diagnostic trouble code from the engine computer. Codes indicate which systems are experiencing problems, not necessarily which specific components have failed. Professional diagnosis determines the actual failed part before any replacements occur.
Repair Verification and Road Testing
Once a failed part is identified the mechanic replaces the part, resets the trouble codes then drives the car to verify the issue has been resolved. After completing repairs, responsible shops clear diagnostic codes, then perform test drives under various conditions to verify repairs resolved the problems. They monitor live data from the engine computer during test drives, watching for any recurring misfires or abnormal sensor readings that might indicate incomplete repairs or additional problems.
This verification step proves critical because sometimes multiple related problems exist simultaneously. For example, worn spark plugs might have caused misfires that damaged the catalytic converter. Replacing only the spark plugs without addressing converter damage means the check engine light returns shortly after you leave the shop. Comprehensive testing ensures all related problems get addressed in a single repair visit.
Repair Costs: Budgeting for Blinking Check Engine Light Fixes
Understanding potential repair expenses for your check engine light flashing helps you budget appropriately and make informed decisions about whether to repair your vehicle or consider retirement if it has high mileage and low value. In 2024 check engine light-related car repair costs dropped nearly 3% to $415.31 from their all-time high of $427.56 the previous year. However, costs vary dramatically depending on the specific problems affecting your vehicle.
Diagnostic Testing Fees
Diagnostic fees can vary depending on the make and model of your car, as well as the expertise of the mechanic. On average, you can expect to pay anywhere from $50 to $200 for a diagnostic test. Most repair shops charge diagnostic fees covering technician time spent retrieving codes, performing inspections, and testing components to identify failed parts. Check Engine Light Diagnosis & Testing costs between $122 and $233 on average.
Many shops apply diagnostic fees toward your total repair bill if you proceed with repairs at their facility. Some shops waive diagnostic fees entirely as courtesy to customers. Major auto parts retailers often provide free basic code reading services, though these simple scans only retrieve codes without the comprehensive testing and expert interpretation that professional diagnostics provide.
Common Repair Cost Ranges
Spark Plug Replacement: $100 to $400
The error of the Check Engine light flashing is usually caused by a spark plug malfunction such as a dirty spark plug, a damaged spark plug connector, or a damaged high-voltage wire. Spark plug replacement represents one of the most affordable check engine light repairs. Most vehicles require four to eight spark plugs depending on engine cylinder count. Labor typically runs $50 to $200 depending on spark plug accessibility, while parts cost $50 to $200 for complete sets. Some high-performance vehicles with difficult-to-access spark plugs require significantly more labor time, pushing costs higher.
Ignition Coil Replacement: $200 to $500 Per Coil
Faulty spark plugs can cause ignition coils to fail, which can cause slower acceleration, loss of power, poor fuel economy, engine misfires and trouble starting the car. Modern vehicles use individual coil packs for each cylinder, meaning coil failures affect specific cylinders. Replacing an ignition coil typically costs between $200 and $500. Many technicians recommend replacing multiple coils simultaneously if one fails in high-mileage vehicles, as other coils likely approach end of life. While this increases immediate costs, it prevents paying for labor multiple times as additional coils fail individually over subsequent months.
Oxygen Sensor Replacement: $150 to $450
If an oxygen sensor fails, you may notice reduced fuel economy; otherwise, the car may appear to run normally. Most vehicles have two to four oxygen sensors positioned before and after catalytic converters. Individual sensor replacement typically costs $150 to $250 including parts and labor. The cost of replacing a mass airflow sensor can range from $150 to $400. Vehicles with sensors located in difficult-to-reach positions may require additional labor time, increasing costs.
Fuel Injector Service or Replacement: $150 to $800
Fuel injector problems often respond to professional ultrasonic cleaning services costing $150 to $300 for all injectors. However, severely clogged or mechanically damaged injectors require replacement. Individual injector replacement costs $150 to $300 per injector, while replacing complete sets simultaneously can cost $400 to $800 depending on engine design and injector accessibility.
Catalytic Converter Replacement: $500 to $2,500
The most common check engine-related car repair in 2024 was “replace catalytic converter(s),” which is back atop the list after a year hiatus. Catalytic converter replacement represents the most expensive common check engine light repair. Replacing a catalytic converter is a more expensive repair, with costs ranging from $500 to $2,000, depending on the vehicle. At the top of the repair list, catalytic converter replacements averaged $1,348.
Large vehicles, trucks, SUVs, and vehicles with V6 or V8 engines often have multiple catalytic converters, potentially doubling or tripling replacement costs. The high expense reflects both the precious metals (platinum, palladium, rhodium) inside converters and the labor-intensive installation process involving exhaust system welding or bolting.
Fuel Pump Replacement: $400 to $1,200
Fuel pump replacement costs vary dramatically based on vehicle design and pump accessibility. Vehicles with external pumps or easy access panels cost less to service, while designs requiring complete fuel tank removal incur substantially higher labor charges. Parts typically cost $200 to $500, with labor adding $200 to $700 depending on complexity. High-performance vehicles and some imported models may exceed these ranges due to expensive specialty pumps.
Mass Airflow Sensor Replacement: $150 to $400
Mass airflow sensors measure incoming air volume, allowing proper fuel delivery calculations. Replacement typically costs $150 to $400 including parts and labor. These sensors mount externally in intake air ducts, making them relatively accessible and straightforward to replace. Some vehicles allow cleaning MAF sensors with specialized cleaners costing $10 to $20, potentially resolving problems without replacement.
Regional and Shop Type Cost Variations
Repair costs vary significantly by geographic region and shop type. The West had the highest total average repair cost of $415.74, followed by the South at $409.38, the Northeast at $403.85 and the Midwest at $375.64. Urban metropolitan areas typically charge higher labor rates than rural locations due to increased overhead costs and higher wages.
Dealership service centers generally charge premium rates compared to independent repair shops, often 20% to 40% higher for identical repairs. However, dealerships offer specialized expertise for complex problems, access to manufacturer technical support, and guaranteed original equipment manufacturer parts. Independent shops provide more affordable alternatives while often delivering comparable quality service, particularly for common repairs like spark plugs and ignition coils.
Chain repair shops fall somewhere between dealerships and independent shops in pricing. They offer consistent service standards across locations, nationwide warranties on parts and labor, and corporate oversight ensuring quality control. However, they may lack the specialized knowledge or personal attention that excellent independent shops provide.
Strategies for Managing Repair Costs
Getting multiple repair estimates helps ensure fair pricing and prevents overpaying for necessary repairs. Most shops provide free written estimates based on diagnostic findings. Compare these estimates carefully, noting differences in parts quality (original equipment versus aftermarket), warranty coverage, and included services. The lowest estimate isn’t always the best value if it uses inferior parts or provides limited warranty coverage.
Ask technicians to prioritize repairs by urgency. When facing multiple problems, understanding which repairs prevent immediate damage versus which can wait for future service helps budget-constrained owners make informed decisions. For example, addressing misfires immediately prevents catalytic converter damage, while replacing an aging oxygen sensor might safely wait a few weeks without causing additional problems.
Consider whether quality aftermarket parts offer acceptable alternatives to expensive original equipment manufacturer parts. While OEM parts guarantee factory specifications and fitment, reputable aftermarket manufacturers often produce components meeting or exceeding OEM quality at lower prices. Discuss options with your technician, particularly for vehicles with high mileage where investing in premium OEM parts may not make economic sense.
DIY Diagnosis and Repair: What You Can Do Yourself
While professional diagnosis and repair remain the safest approach for addressing a blinking check engine light, mechanically inclined vehicle owners with proper tools and knowledge can sometimes perform basic diagnostic steps and simple repairs themselves. Understanding what you can safely handle versus what requires professional expertise helps make cost-effective decisions while avoiding expensive mistakes that worsen problems.
Essential Tools for DIY Diagnostics
OBD-II Code Reader: $20 to $150
The most critical tool for DIY diagnostics, an OBD-II scanner plugs into your vehicle’s diagnostic port and retrieves stored trouble codes. Basic code readers costing $20 to $50 simply display codes that you can research online. Mid-range scanners costing $50 to $150 provide additional features like live data streaming, freeze frame information, and the ability to clear codes after repairs. Advanced scan tools costing $150 and up offer comprehensive diagnostic capabilities approaching professional-grade equipment.
Socket Set and Wrenches: $50 to $200
Comprehensive socket sets including metric and standard sizes, ratchets, extensions, and wrenches allow access to most engine components. Quality tools prevent rounded bolt heads and damaged parts. Investing in decent tools proves worthwhile if you plan performing regular maintenance and repairs yourself.
Multimeter: $20 to $100
Digital multimeters test electrical circuits, measure voltage, check resistance, and verify sensor outputs. These versatile tools prove essential when diagnosing ignition system problems, testing sensors, or troubleshooting electrical issues. Basic automotive multimeters costing $20 to $40 handle most diagnostic tasks adequately.
Spark Plug Gap Tool and Socket: $5 to $20
Specialized spark plug sockets with rubber inserts protect porcelain insulators during removal and installation. Gap tools ensure proper electrode spacing according to manufacturer specifications. These inexpensive tools prove essential for spark plug service.
DIY Diagnostic Procedures
Reading and Researching Diagnostic Codes
Using your OBD-II scanner, retrieve all stored diagnostic trouble codes from your vehicle’s computer. Write down each code along with freeze frame data if your scanner provides this information. Research codes using online databases, manufacturer service manuals, or automotive forums to understand what systems they indicate. Remember that codes point toward problem areas rather than specific failed components.
Visual Inspection of Engine Components
Perform thorough visual inspections looking for obvious problems that might cause misfires. Check all vacuum hoses for cracks, hardening, or loose connections. Inspect wiring harnesses for damaged insulation, corroded connections, or loose plugs. Look for oil leaks around valve covers that might foul spark plugs. Examine the air filter for excessive dirt that might restrict airflow. These simple visual checks often reveal problems without requiring sophisticated testing equipment.
Spark Plug Inspection and Replacement
Accessing and inspecting spark plugs represents one of the most valuable DIY diagnostic procedures. Remove spark plugs one at a time, carefully noting which cylinder each came from. Examine electrode condition, looking for excessive wear, carbon deposits, oil fouling, or physical damage. Compare spark plugs against condition charts showing what different wear patterns indicate about engine operation. If spark plugs show excessive wear or damage, replacement often resolves check engine light issues without further diagnosis needed.
Basic Ignition Coil Testing
Using a multimeter, you can test ignition coil primary and secondary resistance values, comparing measurements against manufacturer specifications found in service manuals or online resources. Significantly out-of-spec readings indicate failed coils requiring replacement. Some DIYers perform coil swap tests, exchanging coils between cylinders to see if misfires follow the moved coil, confirming coil failure.
What DIY’ers Should Not Attempt
Fuel System Repairs
Working on fuel systems presents serious fire hazards requiring specialized safety equipment and procedures. Fuel systems operate under high pressure even when engines are off. Relieving this pressure safely requires special tools and knowledge. Fuel pump replacement typically requires dropping fuel tanks, a difficult and potentially dangerous procedure best left to professionals with proper lifts and safety equipment.
Catalytic Converter Replacement
Catalytic converter replacement involves working under vehicles on extremely hot exhaust systems. Professional shops have lifts, proper exhaust tools, and welding equipment needed for this work. Additionally, many jurisdictions require certified shops to perform catalytic converter replacement to ensure emissions compliance and prevent installation of non-compliant aftermarket converters.
Complex Engine Repairs
Repairs involving cylinder compression problems, head gasket replacement, timing belt/chain service, or internal engine work require specialized tools, extensive knowledge, and experience beyond most DIY capabilities. Attempting these repairs without proper expertise often causes additional damage costing far more to rectify than original problems would have cost to repair professionally.
Advanced Electrical Diagnostics
While testing individual sensors and components proves manageable for experienced DIYers, diagnosing complex electrical problems involving engine control modules, network communications between modules, or intermittent wiring faults requires professional-grade diagnostic equipment and expert-level knowledge.
The Expensive DIY Mistake to Avoid
The most common and costly DIY error involves replacing parts based solely on diagnostic codes without confirming they’ve actually failed. We receive an abundance of stories where consumers replace multiple parts at a guess without resolving their issue. In some cases they are successful but when it goes wrong it can get expensive very quickly. For example, a P0301 cylinder 1 misfire code might prompt a DIYer to replace the cylinder 1 spark plug.
When the light returns, they replace the ignition coil. Still seeing the code, they replace the fuel injector. After spending $400 on parts that didn’t fix the problem, they finally take the vehicle to a professional who diagnoses a simple vacuum leak causing lean conditions in cylinder 1.
Diagnostic codes indicate which systems experience problems, not which specific components have failed. Proper diagnosis involves systematic testing to confirm exactly which part has failed before purchasing replacements. If you’re uncertain about your diagnostic conclusions, having a professional verify your findings before buying expensive parts saves significant money compared to trial-and-error part replacement.
Prevention Strategies: Avoiding Blinking Check Engine Light Emergencies
Preventing blinking check engine light scenarios through regular maintenance and attentive vehicle care proves far more economical than dealing with emergency repairs. Following systematic preventive maintenance schedules and recognizing early warning signs helps avoid expensive failures while extending your vehicle’s reliable service life.
Critical Preventive Maintenance Tasks
Regular Oil Changes: Every 3,000 to 7,500 Miles
The engine oil keeps all moving parts and hoses lubricated to keep wear and tear at a minimum. Clean engine oil at proper viscosity ensures adequate lubrication for all moving parts, removes combustion byproducts, prevents excessive heat buildup, and maintains engine cleanliness. Following manufacturer-recommended oil change intervals represents the single most important preventive maintenance task for engine longevity. Modern synthetic oils typically allow longer intervals (7,500 to 10,000 miles) compared to conventional oils (3,000 to 5,000 miles), but always follow your specific vehicle’s recommendations.
Spark Plug Replacement: Every 30,000 to 100,000 Miles
Proactively replacing spark plugs according to manufacturer schedules prevents misfires before they occur. Conventional copper-core spark plugs typically last 30,000 to 50,000 miles. Platinum spark plugs extend service life to 60,000 to 80,000 miles. Premium iridium spark plugs last 80,000 to 100,000 miles or more. While waiting until spark plugs completely fail might seem economical, the potential for misfire-related catalytic converter damage far exceeds the modest cost of preventive replacement.
Air Filter Replacement: Every 15,000 to 30,000 Miles
Clean air filters maintain optimal airflow to engines, ensuring proper air-fuel mixture ratios. Regularly inspect and replace air filters to maintain optimal combustion and prevent misfires, ensuring smoother engine performance and avoiding costly repairs. Clogged filters restrict airflow, creating rich fuel conditions that foul spark plugs, waste fuel, and reduce performance. Inspecting air filters during every oil change and replacing them when dirty prevents these problems.
Fuel System Maintenance: Every 30,000 to 50,000 Miles
Using quality fuel from reputable stations helps prevent injector clogging and fuel system deposits. Consider adding fuel system cleaner additives periodically to help maintain clean injectors. Vehicles with direct injection engines particularly benefit from professional fuel system cleaning services every 30,000 to 50,000 miles. These services remove carbon deposits that accumulate on intake valves and injector tips, preventing performance problems that can lead to misfires.
Timing Belt Replacement: Every 60,000 to 100,000 Miles
Following manufacturer recommendations for timing belt replacement prevents catastrophic engine damage from belt failure. Most manufacturers specify replacement intervals between 60,000 and 100,000 miles depending on engine design. While timing belts often appear functional beyond these intervals, the consequences of failure include bent valves, damaged pistons, and complete engine destruction costing thousands of dollars to repair. Preventive replacement proves far more economical than emergency repairs after failure.
Recognizing Early Warning Signs
Addressing problems before they escalate to emergency blinking check engine light situations saves substantial money and prevents roadside breakdowns. Pay close attention to these warning signs indicating developing problems:
Subtle Performance Changes
Notice any changes in how your engine runs at idle, including slight roughness, minor vibrations, or fluctuating RPMs. These subtle symptoms often indicate spark plugs nearing end of life, developing ignition coil problems, or beginning fuel injector issues. Addressing these early prevents full misfires that trigger blinking check engine lights.
Gradual Fuel Economy Decline
Track your fuel economy over time. Gradual declines often signal oxygen sensor problems, air filter restriction, developing fuel system issues, or inefficient combustion from aging spark plugs. Investigating fuel economy drops early catches problems before they become emergencies.
Hesitation During Acceleration
If your vehicle stumbles, hesitates, or loses power during acceleration, this indicates fuel delivery problems, ignition system weakness, or developing misfires. These symptoms represent your vehicle warning you about problems before they become severe enough to trigger emergency warnings.
Unusual Smells or Sounds
Burning oil smells might indicate oil leaks onto hot exhaust components or oil consumption from worn engine parts. Sulfur or rotten egg smells suggest catalytic converter problems. Ticking or clicking sounds from the engine bay might indicate valve train issues. Any unusual smell or sound deserves investigation before it develops into serious failures.
Special Considerations for Different Engine Types
Different engine designs require tailored maintenance approaches. For instance, if your vehicle features a high-performance Coyote engine, staying informed about specific maintenance requirements and common issues affecting that powertrain helps provide targeted preventive care. Research your specific engine’s known weaknesses, common failure points, and recommended service intervals.
Turbocharged engines require more frequent oil changes using synthetic oils meeting specific specifications. Direct injection engines benefit from periodic intake valve cleaning services addressing carbon buildup. Hybrid vehicles need both conventional engine maintenance and attention to high-voltage electrical system components. Understanding your engine’s particular needs allows focused preventive maintenance that addresses likely problems before they occur.
Real-World Case Studies: Learning from Others’ Experiences
Examining real-world scenarios where vehicle owners experienced blinking check engine light situations helps illustrate common patterns, diagnostic challenges, and outcomes. These case studies demonstrate both correct and incorrect responses to this critical warning.
Case Study 1: The Neglected Spark Plug Problem
A 2015 Honda Accord owner noticed their check engine light flashing during highway acceleration. They continued driving home approximately 15 miles despite the warning. The next day, a diagnostic scan revealed P0300 random misfire codes along with P0420 catalytic converter efficiency codes. Spark plug inspection showed severely worn plugs with gaps widened well beyond specifications. The vehicle had 85,000 miles without ever replacing the original spark plugs despite Honda recommending replacement at 60,000 miles.
The repair required both spark plug replacement ($180) and catalytic converter replacement ($1,400) because the continued driving with misfires had damaged the converter. Had the owner pulled over immediately when the light started flashing and called for a tow ($100), the total cost would have been just $280 instead of $1,580. This case perfectly illustrates how continuing to drive with a flashing check engine light transforms affordable maintenance into expensive repairs.
Case Study 2: The Intermittent Coil Failure
A 2011 Ford F-150 owner experienced a flashing check engine light only during cold starts that would stop after the engine warmed up. Initial diagnostic scans showed P0303 cylinder 3 misfire codes. The owner replaced the cylinder 3 spark plug, but the problem persisted. A professional diagnostic revealed that the ignition coil for cylinder 3 was failing when cold due to internal circuit breakdown that resolved as the coil warmed up.
This case demonstrates how intermittent problems require more sophisticated diagnosis than simply replacing parts based on codes. The ignition coil replacement ($240) resolved the issue completely. The initial spark plug replacement, while not necessary for this specific problem, represented good preventive maintenance since the plugs showed moderate wear at 72,000 miles.
Case Study 3: The Fuel Quality Issue
A 2018 Toyota Camry owner filled up at an unfamiliar gas station and experienced a flashing check engine light within 10 miles. They immediately pulled over and called for a tow to their regular repair shop. Diagnostic testing revealed P0300 random misfire codes along with P0171 and P0174 lean condition codes. Fuel sample testing showed contaminated fuel with excessive water content.
The repair involved draining the fuel tank, replacing the fuel filter, and refilling with quality fuel ($400 total). While expensive, this cost far less than the catalytic converter damage that would have resulted from continued driving. Additionally, the owner filed a complaint with state weights and measures authorities about the gas station, potentially preventing other customers from experiencing similar problems.
Case Study 4: The High-Mileage Multi-Component Failure
A 2008 Chevrolet Silverado with 160,000 miles experienced a flashing check engine light during towing a trailer. The owner pulled over immediately, unloaded the trailer, and had the vehicle towed home. Professional diagnosis revealed multiple ignition coils nearing failure, spark plugs with excessive wear, and a weakening fuel pump that couldn’t maintain adequate pressure under the heavy load of towing.
The comprehensive repair involved replacing all eight spark plugs ($320), replacing four ignition coils ($800), and installing a new fuel pump ($950) for a total of $2,070. While expensive, this represented appropriate maintenance for a high-mileage truck that had provided 160,000 miles of reliable service. The owner’s decision to stop immediately and unload the trailer prevented any catalytic converter damage that would have added $1,500+ to the repair bill.
Common Patterns Across Case Studies
Several consistent patterns emerge across thousands of blinking check engine light scenarios that provide valuable lessons for vehicle owners:
Pattern 1: Progressive Deterioration – Most blinking check engine light situations don’t happen suddenly without warning. They typically follow patterns of gradually worsening minor symptoms like slight roughness, occasional hesitation, or declining fuel economy that owners either don’t notice or choose to ignore.
Pattern 2: Preventive Maintenance Neglect – The majority of cases involve vehicles that have exceeded manufacturer-recommended service intervals for critical maintenance items like spark plugs, air filters, or fuel filters. Following preventive maintenance schedules dramatically reduces the likelihood of emergency check engine light situations.
Pattern 3: Continued Driving Multiplies Costs – In virtually every case where owners continued driving after their check engine light started flashing, repair costs increased substantially compared to immediate towing. The few hundred dollars saved on towing consistently transformed into thousands of dollars in additional catalytic converter replacement costs.
Pattern 4: High-Mileage Vehicles Face Multiple Failures – Vehicles with over 100,000 miles often experience multiple related component failures simultaneously. When one ignition coil fails, others typically follow soon after. When spark plugs wear out, fuel injectors and oxygen sensors may also need attention. Comprehensive diagnostic testing identifies all related problems, preventing repeated shop visits for progressive failures.
Frequently Asked Questions About Blinking Check Engine Lights
What does it mean when my check engine light is blinking?
A blinking or flashing check engine light indicates a serious problem requiring immediate attention, typically signaling active engine misfires occurring right now. When cylinders misfire, unburned fuel dumps into your exhaust system where it can overheat and damage your catalytic converter within minutes. This represents an emergency situation demanding you pull over safely and stop driving immediately to prevent expensive damage.
Should I stop driving immediately when my check engine light starts flashing?
Yes, you must pull over to a safe location immediately and turn off your engine when your check engine light starts flashing. Do not attempt to drive to your destination or even to the nearest repair shop. Continuing to drive with active misfires causes severe catalytic converter damage costing $500 to $2,500 to repair, plus potential additional engine damage. The cost of towing ($75 to $150) proves far less expensive than the damage caused by continued driving.
Can I drive if my blinking check engine light goes off?
No, you should not drive your vehicle even if the blinking check engine light stops flashing or goes off completely. The diagnostic trouble codes remain stored in your vehicle’s computer, and the underlying mechanical problem still exists. The misfires might have temporarily stopped due to changing conditions, but the problem will return and likely worsen. Have your vehicle towed to a repair facility for proper diagnosis before driving it again.
How much does fixing a blinking check engine light typically cost?
Repair costs vary widely depending on the underlying cause. Diagnostic testing costs $50 to $200. Simple spark plug replacement runs $100 to $400. Ignition coil replacement costs $200 to $500 per coil. Fuel injector service or replacement ranges from $150 to $800. Catalytic converter replacement, the most expensive common repair, costs $500 to $2,500. The average repair cost for check engine light issues is approximately $415, though severe problems can exceed $3,000.
What causes a check engine light to flash?
The most common cause is engine misfiring where one or more cylinders fail to fire properly. Misfires result from worn spark plugs, failed ignition coils, clogged fuel injectors, low fuel pressure, vacuum leaks, or sensor malfunctions. Other causes include severely damaged catalytic converters creating excessive exhaust back pressure, contaminated fuel, or mechanical engine problems like low compression from worn piston rings or damaged valves.
Will a flashing check engine light damage my engine?
Yes, continuing to drive with a flashing check engine light causes serious damage. The engine misfires dump raw fuel into your exhaust system, where it ignites inside your catalytic converter, creating temperatures exceeding 1,600 degrees that melt internal components. This damage costs $500 to $2,500 to repair. Extended driving with misfires also contaminates engine oil, damages oxygen sensors, and can harm pistons, valves, and other internal engine components.
Can bad gas cause a blinking check engine light?
Yes, contaminated or poor-quality fuel can cause engine misfires that trigger a blinking check engine light. Water in fuel, improper octane ratings, or contamination with diesel or other substances disrupts proper combustion. If you experience a flashing check engine light shortly after refueling at an unfamiliar station, contaminated fuel might be the cause. Professional diagnosis including fuel sample testing can confirm this issue.
How do I diagnose why my check engine light is blinking?
Professional diagnosis begins with connecting an OBD-II scanner to retrieve diagnostic trouble codes from your vehicle’s computer. Technicians then perform visual inspections, test suspected components, check manufacturer Technical Service Bulletins for known issues, and conduct focused testing based on codes and symptoms. DIY owners can retrieve codes using inexpensive scanners and perform basic visual inspections, but confirming which specific components have failed typically requires professional expertise and equipment.
Is it safe to reset a blinking check engine light?
Resetting or clearing a blinking check engine light without repairing the underlying problem is unsafe and ineffective. The light will immediately return once the vehicle’s computer detects the problem again. More importantly, clearing codes erases valuable diagnostic information including freeze frame data showing exactly what conditions existed when problems occurred. Always repair the underlying cause before clearing codes, and verify repairs resolved the issue through test driving before considering the problem fixed.
Can low oil cause a check engine light to blink?
Severely low oil level or oil pressure can contribute to engine problems that trigger a blinking check engine light, though this typically also illuminates the oil pressure warning light. Low oil can cause timing system problems, bearing wear, or inadequate valve train lubrication, all of which can lead to misfires. However, blinking check engine lights more commonly result from ignition system, fuel system, or sensor problems rather than oil level alone.
Why does my check engine light blink only when accelerating?
A check engine light that blinks only during acceleration typically indicates problems that manifest under increased engine load. Common causes include weak ignition coils that can’t generate adequate spark under load, fuel pumps unable to maintain proper pressure during high fuel demand, clogged fuel injectors causing lean conditions under acceleration, or carbon deposits on valves disrupting airflow during high-RPM operation. Professional diagnosis can identify which load-dependent component is failing.
What’s the difference between a blinking and solid check engine light?
A solid or steady check engine light indicates a problem that needs attention but isn’t causing immediate damage, such as minor sensor malfunctions, evaporative emission leaks, or aging components. You can generally continue driving carefully and schedule repairs soon. A blinking or flashing check engine light signals an emergency, typically active engine misfires causing immediate damage. This requires pulling over and stopping immediately to prevent catalytic converter destruction and other expensive damage.
Take Immediate Action on Your Blinking Check Engine Light
Your blinking check engine light represents your vehicle’s most urgent warning short of visible smoke or flames. This critical alert demands immediate response because every second you continue driving multiplies the damage occurring inside your exhaust system and engine. The choice you make in those first moments after noticing the flashing light determines whether you face a manageable $200 to $500 repair or a catastrophic $1,500 to $3,000 disaster.
The good news is that addressing a blinking check engine light promptly typically results in straightforward, affordable repairs that any qualified mechanic can complete efficiently. Most causes stem from routine maintenance items like spark plugs, ignition coils, or fuel system components that naturally wear over time. The critical difference between minor inconvenience and major expense lies entirely in how quickly you respond when that light starts flashing.
Don’t gamble with your vehicle’s health, your safety, or your financial wellbeing. If you’re experiencing a blinking check engine light right now, pull over immediately, turn off your engine, and arrange for towing to a qualified repair facility. Your decisive action protects your catalytic converter, preserves your engine, and saves you thousands of dollars compared to the alternative of continued driving.
Prevention through regular maintenance remains your best strategy for avoiding these emergencies entirely. Stay current with manufacturer-recommended service schedules, replace spark plugs at specified intervals, address minor symptoms promptly, and pay attention to your vehicle’s changing behavior. These simple practices keep your check engine light off and your vehicle reliably serving you for years to come.
Sources and Citations:
- Jak Electronics. “Why is my check engine light flashing then stops & how to fix it?” Retrieved November 2024. https://www.jakelectronics.com/blog/why-is-my-engine-light-blinking-and-how-to-fix-it
- CarMD Vehicle Health Index. “2024 Check Engine Light Repair Costs Report.” Industry analysis of check engine light repairs across millions of vehicles.
- RepairPal. “Check Engine Light Diagnosis & Testing Cost Estimates.” Comprehensive repair cost data, 2025.
- National Institute for Automotive Service Excellence (ASE). “Understanding On-Board Diagnostics.” Technical guidance on OBD-II systems.
- Society of Automotive Engineers (SAE). “Diagnostic Trouble Code Standards.” SAE J2012 standard specifications for OBD codes.