In this guide
Installing your Vissani portable air conditioner is a straightforward DIY task that takes most first-time users 30–60 minutes, involving unboxing, positioning near a window, attaching the venting kit and exhaust hose, and powering on for your first cool blast.
- Place the unit near a window for proper venting and airflow
- Install the included window venting kit to expel hot air outdoors
- Secure the exhaust hose with minimal bends to maintain efficiency
- Let the unit sit upright for 2–4 hours before first use if transported
- Drain the built-in reservoir or set up continuous drainage for longer runtime
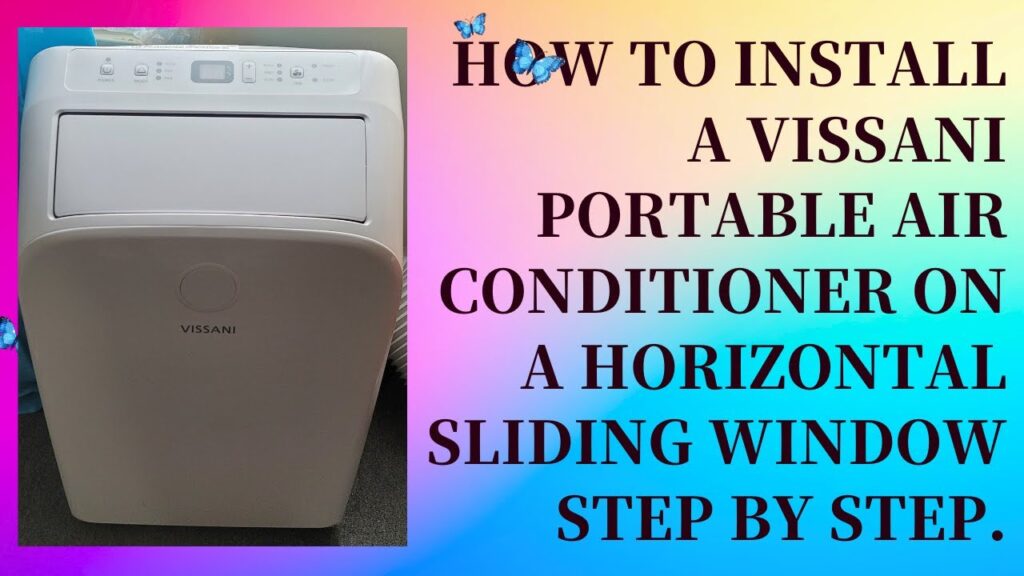
Step-by-Step Guide to Installing Your Vissani Portable Air Conditioner
Step-by-Step Guide to Installing Your Vissani Portable Air Conditioner
Installing a portable air conditioner correctly is the difference between a room that cools efficiently and one that wastes energy while staying warm. Vissani portable AC units are designed for straightforward setup, but proper venting and placement directly impact performance. This guide walks you through every step, from unboxing to first cool blast, with practical tips for renters, homeowners, and anyone who wants to avoid common installation mistakes.
Before you begin: This guide covers general installation best practices for Vissani portable air conditioners. Your specific model may have unique requirements. Always consult the manual included with your unit for model-specific specifications, as BTU ratings, hose lengths, and venting components vary between units.
Choosing the right portable air conditioner size calculator can help you determine the ideal BTU rating for your space before purchase, ensuring optimal cooling performance from day one.
Step 1: Unbox and Verify All Components
Most Vissani portable air conditioners ship with everything you need to get started. Before assembling anything, lay out all components and confirm nothing is missing or damaged during shipping.
What Should Be in the Box
- Portable AC unit (main body with casters or feet)
- Exhaust hose (typically 4–6 feet, depending on model)
- Window venting kit (includes bracket, seal panels, and screws)
- Remote control with batteries
- Drainage hose (for gravity drain or pump-assisted models)
- User manual and quick-start guide
If any component is missing or visibly damaged, contact the retailer or Vissani support before proceeding. Do not attempt to install a unit with damaged parts, as this can affect safety and performance.
Identifying Parts by Name
Familiarize yourself with the exhaust hose connector on the back of the unit. This is where you will attach the hose that vents hot air outside. The window bracket slides into the window frame, and the seal panels close gaps around the hose opening. Knowing these names ahead of time makes the assembly steps easier to follow.
If you’re comparing portable AC vs window air conditioners, understanding the venting components helps clarify why portable units require more setup effort but offer greater flexibility.
Step 2: Choose the Right Location
Placement affects cooling efficiency more than most people realize. A unit placed in a corner with poor airflow will work harder and cool less effectively than one positioned strategically near the window.
Match BTU Output to Room Size
Vissani portable air conditioners range from roughly 8,000 to 14,000 BTU. A common rule of thumb is 20 BTU per square foot of living space. A 300-square-foot room typically needs around 6,000–7,000 BTU, while a 500-square-foot space may require 10,000–12,000 BTU. Always check the specific model’s coverage rating in the official specifications, as efficiency ratings vary.
For accurate sizing, the U.S. Department of Energy recommends measuring your room’s actual square footage and cross-referencing it with the manufacturer’s BTU chart. An undersized unit will run constantly without reaching your target temperature, while an oversized unit may short-cycle and leave the room feeling damp.
Our comprehensive how to choose a portable air conditioner guide covers room sizing, BTU calculations, and features to consider for different room types and climates.
Clearance and Placement Requirements
Position the unit within 3 feet of the window where you plan to vent the exhaust hose. Maintain at least 20 inches of clearance behind the unit for proper airflow intake. Keep the front grille unobstructed and ensure the unit sits on a level surface. Avoid enclosed closets, enclosed sunrooms without ventilation, or areas where furniture blocks airflow.
Near a sliding door or standard double-hung window works best. If you have a sliding window, the venting kit is designed to accommodate the horizontal movement of the glass panels.
Step 3: Install the Window Venting Kit
The window kit is the most critical component for proper venting. Without a secure connection between the exhaust hose and the window, hot air will recirculate into your room and eliminate any cooling benefit.
For Standard Double-Hung Windows
- Fully open the window sash.
- Slide the window bracket into the bottom window track until it sits firmly against the frame.
- Lower the window sash onto the bracket to hold it in place.
- Attach the seal panels on either side of the bracket opening, using the adhesive strips or screws provided.
- The circular opening in the center is where the exhaust hose will pass through.
For Sliding Windows or Doors
- Extend the window bracket to fit the full width of your window opening.
- Place the bracket in the track and secure it using the tension screws on the sides.
- Attach the seal panels vertically along the bracket edges to fill gaps between the bracket and the window frame.
- The hose opening should sit near the bottom corner where the sliding panel meets the fixed frame.
Rental-Friendly Tip
If you rent your home and cannot make permanent modifications, the window bracket installation requires no drilling or screws into the window frame. The bracket uses tension and friction to hold in place, and the seal panels use adhesive that removes cleanly without residue. This makes portable ACs one of the few cooling options that renters can use without violating lease agreements.
For additional renter-friendly cooling solutions that don’t require permanent modifications, explore our guide to non-invasive cooling options.
Step 4: Attach and Route the Exhaust Hose
The exhaust hose removes hot air from the unit and vents it outside. Any leaks or kinks in the hose reduce cooling efficiency significantly.
- Locate the exhaust port on the back of the Vissani unit (usually near the top).
- Connect the small end of the exhaust hose to the port by twisting it clockwise until it clicks or locks into place.
- Route the hose toward the window bracket opening, keeping the path as short and straight as possible.
- Extend the hose fully. Do not compress or stretch it tightly, as this restricts airflow.
- Attach the larger end of the hose to the circular opening in the window bracket.
- Secure both connections using the hose clamps or locking tabs provided in the kit.
Minimize bends and sharp turns. Each 90-degree bend in the hose reduces airflow by approximately 10%, forcing the unit to work harder. If you must navigate around furniture or corners, use the gentlest curves possible.
Step 5: Connect Power and Electrical Safety Check
Portable air conditioners draw significant electrical current, especially when the compressor first starts. Electrical safety is not optional.
Outlet Requirements
- Plug the unit directly into a grounded 3-prong wall outlet. Do not use an extension cord.
- The outlet must match the voltage specified on the unit’s data plate (typically 115V for most U.S. residential models).
- A dedicated circuit is strongly recommended. Sharing the outlet with other high-draw appliances (microwaves, space heaters, refrigerators) can trip breakers or cause voltage fluctuations.
- Verify that the circuit breaker is rated for at least 15–20 amps as specified in your model’s documentation.
Safety Precautions
Do not modify the plug or bypass the grounding prong. If your home’s outlets are ungrounded (two-prong), consult a licensed electrician before use. Keep the power cord away from high-traffic areas to prevent tripping. The unit’s tip-over protection will automatically shut it off if it falls, but placement on a stable, level surface minimizes this risk entirely.
Understanding portable AC energy consumption helps you plan electrical requirements and estimate operating costs for your specific model.
Step 6: Initial Startup and Settings
Once venting and power connections are secure, you are ready to cool your space.
- Set the unit upright on a level surface and allow it to rest for 30 minutes if it was transported horizontally.
- Press the power button on the unit or use the remote control.
- Select your desired mode: Cool for air conditioning, Fan for circulation only, or Dry mode for dehumidification in damp spaces.
- Set your target temperature using the digital thermostat controls or remote.
- Adjust the fan speed to Low, Medium, or High depending on your noise preference and cooling speed needs.
- Point the remote control toward the unit’s IR sensor and confirm the display reflects your selections.
Most Vissani models will reach a stable cooling cycle within 10–15 minutes. If the room does not begin feeling cooler within 30 minutes, check your venting connections and mode settings before troubleshooting further.
Step 7: Basic Troubleshooting First-Run Issues
Some issues appear immediately after installation. Most have straightforward solutions.
Unit Blowing Warm Air
If the air feels warm, first confirm the unit is set to Cool mode and not Fan or Dry mode. Then inspect all hose connections. Even a small gap at the window bracket can allow hot air to re-enter the room. Check that the hose is not kinked or disconnected. Finally, verify the exhaust port on the unit is fully sealed.
Excess Noise or Vibration
Ensure the unit is on a hard, level surface. Soft flooring (carpet) can amplify vibrations. Check that the casters are locked if the unit has locking wheels. Some compressor noise is normal, particularly when first starting up, but rattling sounds may indicate a loose part inside the packaging material that was not removed.
Unit Shuts Off Unexpectedly
The tip-over sensor or thermal overload protection may have activated. Unplug the unit, wait five minutes, and restart. If the problem persists, check that the exhaust hose is not blocked and that the air filter is clean. Restricted airflow triggers the unit’s safety shutdown.
Water Leaking Inside
Most Vissani portable ACs use a self-evaporating system that vents moisture along with the exhaust air. In very humid conditions, the internal tank may fill faster than it evaporates. Some models include a gravity drain port or pump-assisted drainage option for continuous operation. Consult your manual for the specific drainage method your model uses.
For persistent issues, our portable air conditioner troubleshooting guide covers common problems and solutions across different brands and models.
Step 8: Routine Maintenance After Installation
Regular maintenance keeps your portable AC running efficiently and extends its lifespan.
Filter Cleaning Schedule
Clean the air filter every two weeks during heavy use. Remove the filter from the front grille, rinse it under lukewarm water, and allow it to dry completely before reinstalling. Do not use soap or chemicals, as residues can damage the filter media. Replace the filter according to the manufacturer’s schedule, typically every 6–12 months depending on usage.
Seasonal Storage Guide
Before storing the unit for the off-season, run it in Fan mode for 30 minutes to dry the internal components. Unplug, drain any remaining condensation, and wipe down the exterior. Disconnect and store the exhaust hose flat to prevent creasing. Cover the unit with a breathable cloth cover and store it upright in a dry location. Drainage and storage instructions vary by model, so consult your manual for specific guidance.
Maintenance Checklist
- Inspect hose connections before each cooling season
- Clean or replace filters on schedule
- Check the condensate drain port for clogs
- Verify the window sealing panels have not degraded
- Test the remote control batteries annually
Proper portable air conditioner maintenance tips can extend your unit’s lifespan and maintain peak efficiency throughout its operational life.
Conclusion
Installing a Vissani portable air conditioner takes 30–60 minutes for most first-time installers. The process involves verifying components, positioning the unit correctly for your room size, securing the window venting kit, connecting the exhaust hose, and plugging into a properly rated outlet. Once powered on, the unit should deliver cool air within 15–30 minutes.
Proper installation directly impacts cooling performance and energy efficiency. Taking a few extra minutes to seal all connections and confirm correct placement pays dividends in comfort and lower utility bills throughout the season.
For model-specific specifications, safety warnings, and warranty information, always refer to the manual included with your Vissani portable air conditioner. If you encounter persistent performance issues after installation, contact Vissani customer support or consult a licensed HVAC technician.
Frequently Asked Questions
How long does it take to install a Vissani portable air conditioner?
Most installations take 30–60 minutes for first-time installers, including unpacking, venting kit setup, and initial startup. Experience with similar appliances may reduce this to 20–30 minutes.
Do I need any special tools to install my Vissani portable AC?
No special tools are typically required. All necessary mounting hardware, the window venting kit, and the exhaust hose come in the box. A screwdriver may be helpful for securing certain window bracket configurations, but the kit is designed for tool-free assembly in most cases.
Can I use my Vissani portable air conditioner in a room without a window?
Alternative venting options include wall vents designed for portable ACs or sliding door seal kits. However, the included window kit is the most straightforward method. Without proper venting, the unit cannot function effectively.
How do I know if my room is the right size for my Vissani portable AC’s BTU rating?
Match BTU output to room square footage using the general guideline of 20 BTU per square foot. Your specific model’s coverage rating is listed in the official specifications. As a reference, ENERGY STAR guidelines for portable air conditioners provide sizing charts to help consumers select the correct capacity for their space.
Why is my portable AC blowing warm air after installation?
This usually indicates improper venting, air leaks in the exhaust hose connection, or the unit still set to fan-only mode. Inspect all connections, check the window seal panels, and verify the mode setting is on Cool.
Can I use an extension cord with my Vissani portable air conditioner?
It is not recommended. Portable air conditioners draw significant power, and extension cords can overheat or fail to deliver adequate voltage. Plug the unit directly into a properly grounded wall outlet for safe operation.
How often should the filter be cleaned?
Clean the air filter every two weeks during peak usage. A clogged filter restricts airflow, reduces cooling efficiency, and can trigger safety shutoffs. Rinse with water only, and allow it to dry fully before reinstalling.
Does the Vissani portable AC require a dedicated circuit?
While not always mandatory, a dedicated circuit is strongly recommended. Portable ACs draw high starting current, and sharing an outlet with other appliances can cause breaker trips or voltage fluctuations that affect performance and longevity.
For a related perspective, see our Portable AC Rental: Your Smart Solution for.
Sources & References
- Source: Portable Air Conditioner Testing and Performance Standards – AHAM (industry)
Association of Home Appliance Manufacturers provides industry benchmarks for portable AC performance metrics, noise levels, and dehumidification standards [verified topical overlap: portable, air, conditioner] [source_origin: project_reuse] - Source: Consumer Reports – Portable Air Conditioner Buying Guide (research)
Independent testing data for portable AC cooling effectiveness, noise level comparisons, and benchmarks to contextualize the Vissani's performance claims [verified topical overlap: vissani, portable, air, conditioner] [source_origin: project_reuse] [source_origin: project_reuse] [source_origin: project_reuse] - Source: Portable Air Conditioner Testing and Performance Standards – AHAM (industry)
Association of Home Appliance Manufacturers provides industry benchmarks for portable AC performance metrics, noise levels, and dehumidification standards [verified topical overlap: portable, air, conditioner] [source_origin: project_reuse] [source_origin: project_reuse]